Creating a Facebook Ad
This is the final post in a multi post series on Creating Facebook Ads, you can see the previous post by clicking Part 1, Part 2, and Part 3.
We’re finally at the end of the series and this is what we’ve been working towards all this time! We’re going to create a Facebook Ad! Whooohooo!
Let’s do a little recap.
In the first post, we talked about the benefits of advertising and getting your practice out there and in the minds of your potential patients. We also said that for advertising to work, it takes about 7 interactions or touches before a potential customer will act on the advertisement.
Also, in the first post, we talked about the expansiveness of Facebook and the benefits of using it to find potential patients. We started a quest to find “Back pain patients in Austin” and journeyed into the far off lands of creating a Facebook Audience. (quest… journey… yes I watched Lord of the Rings during the holidays!)
In the second post, we talked about what a marketing campaign is and learned to create our first Facebook Campaign. (We ventured into the kiddie pool.)
Then, in the third post, we discovered the Facebook Ad Set and created one with a reasonable budget targeting our Facebook Audience for a set duration. (Watch out we’re swimming in the deep end!)
And now, we’re here at the magnum opus, the creation of the Facebook Ad. (Now we’re swimming with the sharks!)
Let’s get going!
Create an Ad
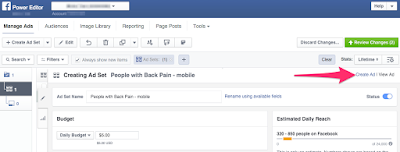
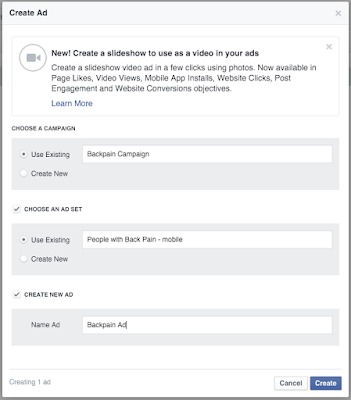
In the last post, we created a Facebook Ad Set called “People with Back Pain – mobile”. On the Ad Set, you’ll see a Create Ad link. Click that!
Facebook Page
Use Existing Post
In this section you can choose to Create Ad or Use Existing Post. Creating an Ad from scratch is definitely something you should experiment, however, for the purposes of this tutorial, we’re going to Use Existing Post for the Ad.
In the Page Post drop down, select your Back pain page post.
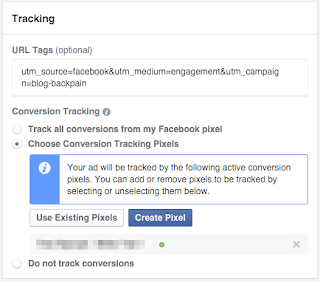
Tracking
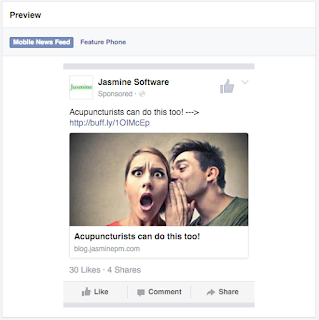
Preview
The Preview pane shows you what the Ad will look like in the various formats chosen for the Ad Set. (Bask in the glory of our final product!)
Once everything looks good, you’re ready to click the Review Changes button and send your Campaign and Ad to Facebook for approval!
That’s it! We’ve done it! We’ve created our first Facebook Ad and you are now an internet marketing expert!
I think this is definitely a reason to celebrate, now go have yourself a glass of wine… make that 2, you’ve earned it!
Questions? Let me know in the comments below. I’d love to hear from you.
Minto Tsai
Founder
P.S. If this helped you, please Like, Share, email… all the social network love you can give!


